| |
| |
Consoles can use MIDI via the rear input and output DIN sockets. MagicQ PC (Windows, Mac and Linux) can use 3rd party USB or virtual MIDI interfaces.
MagicQ can send and receive MIDI Timecode (MTC), Notes on/off and Control Change (CC) messages.
MagicQ can receive Beat Clock and MIDI Show Control (MSC) messages.
On MagicQ PC Systems MIDI is only supported when fully unlocked. Note that MagicQ licencing changed from v1.9.5.1 onwards, for MIDI Notes on PC is enabled when MagicQ is fully unlocked. MIDI notes is not available on PC when a GeNetix GN2 / Legacy Dual DMX / MagicDMX / Legacy Audio Interface or Legacy SnakeSys products are connected to the system.
Table 40.1. Supported MIDI messages
| Product | MIDI messages |
|---|---|
MagicQ PC (demo mode) / Reduced Mode | None |
MagicQ PC (fully unlocked) | MTC, Beat clock, Notes, CC, MSC |
MQ50 (2019)1 | Notes, CC, MSC |
MQ70, MQ80, Stadium Connect, MQ250M, MQ500(M)1 | MTC, Beat clock, Notes, CC, MSC |
MQ60, MQ70 (old), MQ100 Pro 2014 | Beat clock, Notes, MSC |
MagicQ blue USB MIDI/Timecode box2 | MTC, Beat clock, Notes, MSC |
1 Minimum firmware version of V1.25 is recommended.
2 Use of the MagicQ USB MIDI/Timecode box with MagicQ PC additionally unlocks all MIDI functions via a 3rd party USB or virtual device.
A minimum MagicQ version of 1.8.6.5 is recommended (for consoles and PCs), due to the various MIDI fixes and enhancements in this release.
MIDI is configured in the SETUP window, VIEW SETTINGS → MIDI Timecode tab. On MagicQ PC, you must also select the MIDI device in the Tools → Virtual (USB) MIDI Setup… menu at the top.
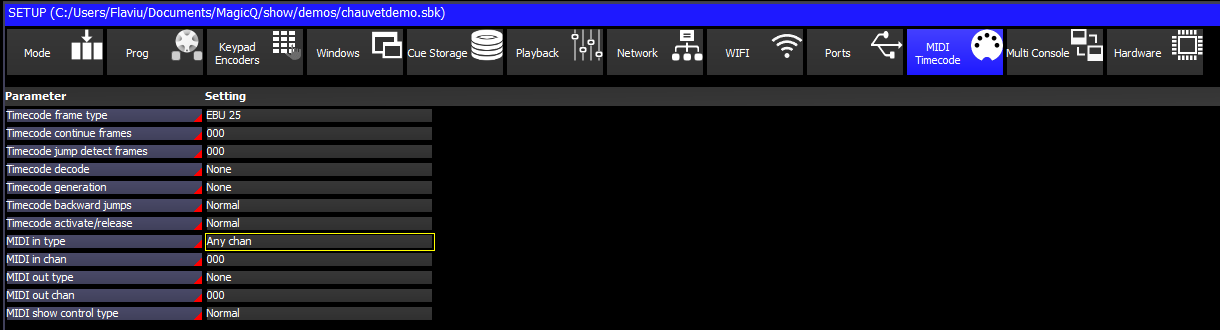
To receive MIDI notes, set the MIDI In Type in the SETUP window. You can choose between "None", "Any chan" and "Requested Chan". When set to "Requested Chan" the requested channel is configured in the MIDI IN Chan field.
When using MIDI notes, the Timecode options can be set to none and then the last received MIDI command will be shown in the Status Display.

MagicQ supports triggering of automated events via MIDI in the Macro Window, View Autom.
Autom events can be set to trigger Playbacks, Cue Stacks, Cues and other events when MIDI Notes and CC messages are received.

In the EXECUTE window, pressing encoder D enables and disables MIDI Learn mode.
When this mode is enabled, any MIDI Note or CC message received will be assigned to trigger the currently selected execute box (use the cursor keys to change the selected box). This adds or replaces entries in the MACRO → VIEW AUTOM window.
In the MACRO → VIEW AUTOM window, pressing encoder X enables and disables MIDI Learn mode. When enabled, the currently selected automation row will be changed whenever a MIDI Note or CC messages is received.
MagicQ supports a custom MIDI mapping file for use instead of the Autom events - this enables greater flexibility and control. If any Autom events are set to respond to MIDI then the MIDI mapping file is ignored.
MagicQ uses the text mapping file miditable.txt stored in the MagicQ folder to convert from MIDI commands to MagicQ serial commands.
An example file miditable.txt is included which maps MIDI notes to the
playbacks PB1 to PB34. Each line in the file specifies a received MIDI
command and then the mapping to the serial command in inverted comments
"".
For example, the first to lines in the default file are:
144,36"1t"
128,36"1u"
MagicQ checks the received MIDI note byes to see whether they match the values. So if the MIDI message matches 144 36 then it executes the remote command 1t (Test Playback 1). Similarly if it matches 128 36 then executes the remote command 1u (UnTest Playback 1).
Note that Test and Untest are like Activate and Release except they force the Playback level to be 100% and 0% respectively.
Note that for security reasons MagicQ limits the number of playbacks that can be controlled using MIDI and the remote protocols. On MagicQ consoles PB1 to PB34 can be controlled. On MagicQ PC, playbacks PB1 to PB10 can be controlled.
Users may use their own MIDI conversion file usermidimap.txt rather
than the in-built miditable.txt. This avoids user midi tables being
overwritten when new software versions are loaded, since only the
miditable.txt is updated on software updates.
It is possible to match all 3 MIDI message bytes including the velocity. So for example:
144,36,100"1t"
144,36,101"1u"
This would execute the Test Playback 1 when Note On for note 36 at velocity 100 was received and Untest Playback 1 when Note On for note 36 at velocity 101 was received.
To jump within a Cue Stack instead of testing / untesting a Playback just change the remote command in the inverted comments.
144,36"1,10j" (Jump to Cue Id 10 on Playback 1)
It is also possible to map the note or velocity directly into the remote command using the %01 for the note and %02 for the velocity.
So the following command would look for Note On, Note 36 and then use the Velocity to jump to a specific step on the Playback.
144,36"1,%02j"
144,36"82,%02H"
The %02 is replaced with the velocity received, so that if MagicQ receives 144 36 50 then it will execute the remote command 1,50j, which jumps to Cue Id 50 on Playback 1
For the latest list of remote commands check the section on ChamSys Remote Protocol Commands.
144,36"1t"
128,36"1u"
144,38"2t"
128,38"2u"
144,40"3t"
128,40"3u"
144,41"4t"
128,41"4u"
144,43"5t"
128,43"5u"
144,45"6t"
128,45"6u"
144,47"7t"
128,47"7u"
144,48"8t"
128,48"8u"
144,50"9t"
128,50"9u"
144,52"10t"
128,52"10u"
144,53"11t"
128,53"11u"
144,54"12t"
128,54"12u"
144,55"13t"
128,55"13u"
144,56"14"
128,56"14u"
144,57"15t"
128,57"15u"
144,58"16t"
128,58"16u"
144,59"17t"
128,59"17u"
144,60"18t"
128,60"18u"
144,61"19t"
128,61"19u"
144,62"20t"
128,62"20u"
144,63"21t"
128,63"21u"
144,64"22t"
128,64"22u"
144,65"23t"
128,65"23u"
144,66"24t"
128,66"24u"
144,67"25t"
128,67"25u"
144,68"26t"
128,68"26u"
144,69"27t"
128,69"27u"
144,70"28t"
128,70"28u"
144,71"29t"
128,71"29u"
144,72"30t"
128,72"30u"
144,73"31t"
128,73"31u"
144,74"32t"
128,74"32u"
144,75"33t"
128,75"33u"
144,76"34t"
128,76"34u"
It is possible to test how MagicQ responds to Midi commands by typing in the Midi message on the keyboard. This is only supported when connected to a MagicQ Wing or Interface. For example to test the command
144,36,127 Note On, note 36, velocity 127
Type testmidi followed by the message on the keyboard with no spaces between the MIDI values.
testmidi 144,36,127
To transmit a MIDI Note command, first set the MIDI Out Type in the Setup Window. You can choose between "None", "Any chan" and "Requested Chan". When set to "Requested Chan" the requested channel is configured in the MIDI Out Chan field.
When set to "Any chan" MagicQ will send out any MIDI commands specified in the Cue Stack macro field regardless of the channel specified using the channel specified in the Cue Stack macro. When set to "Requested Chan" MagicQ will always change the MIDI commands before transmission to be sent on the requested MIDI channel
MIDI commands are entered in decimal in the Macro field of the Cue Stack Window (page right) using the ‘N’ macro command. It is possible to over-ride the channel specified in the MIDI commands using the MIDI Out Channel in the Setup Window.

MIDI note commands are 3 bytes long, consisting of the command (note on / note off) byte, followed by the note and then the velocity
<command> <note> <velocity>
MIDI notes, Control Change, Program Change and Aftertouch messages are supported.
the <command> denotes the MIDI message type, see table below for the command values
144 | Note On |
128 | Note Off |
160 | Polyphonic Key Pressure (aftertouch) |
176 | Control Change |
192 | Program Change |
208 | Channel Pressure (aftertouch) |
224 | Pitch Bend Change |
For example, to send a note for middle C set the macro field to the following:
N144,60,127 (Note 60 on velocity 127)
N128,60,0 (Note 60 off)
MagicQ accepts both ‘N’ and ‘n’ to specify MIDI commands.
The <command> consists of top 4 bits for the command - 144 for note on, 128 for note off, added to the bottom four bits for the channel - 0 for channel 1, to 15 for channel 16.
So N144 is note on channel 1. N145 is note on channel 2. N128 is note off channel 1. N129 is note off channel 2.
A special MIDI head can be patched that transmits MIDI data whenever the value of its channels change.
You can find the personality the PATCH - CHOOSE HEAD window under Generic - mqmidi. MIDI heads contain three channels: Status, Data 1, Data 2, allowing you to send any MIDI command. These channels can be found on encoders A B C on page 5 of the beam window.
The value of the status channel determines which data channels are sent.
No data will be sent if the status channel is lower than 128 or the data channels are larger than 127, in accordance with the MIDI specification. For more information on the values you can transmit, see https://www.midi.org/specifications/item/table-1-summary-of-midi-message
MIDI will only be sent when the channels change, therefore setting the status to 0 and back can be done for retransmission. Alternatively you can record a playback with the status channel set to 0 and keep it activated permenantly.
If you need to send multiple messages in one cue, you can patch multiple mqmidi heads; heads with lower head numbers will always be processed first. This way, for example, you can set one to a Note On command and another to a Note Off command.
Sending MIDI messages with more than 2 data bytes is not supported via this method. Consider using the cue stack macro column. |
MIDI interfaces can be tested using the test show midilooptest.shw. This show simply runs a 2 step chase on Playback 1 which sends out MIDI commands corresponding to activation and release of Playback 2.
MagicQ responds to the GO, STOP, RESUME and TIMED GO commands.
The effect of the MSC commands is determined by the MSC type. This is configured in SETUP Window, VIEW SETTINGS → MIDI Timecode → Show Control Type. The options are Normal, Cue Stack 1 and Playback 1. This is useful for integration with (e.g.) Strand consoles which only have 1 Cue Stack and which do not allow the show Control commands to be configured.
When set to Normal then MSC commands trigger Cues in the Cue Store or Cue Stacks in the Cue Stack Store. MSC commands with two parameters (Q number, Q list) will trigger Cue Stacks in the Cue Stack Store. MSC commands with one parameter (Q number) will trigger Cues in the Cue Store.
When set to Cue Stack 1 or Playback 1 then the commands will affect Cue Stack 1 or the Cue Stack stored on Playback 1 respectively.
MagicQ ignores the times in the TIMED GO command and uses the programmed times. GO and RESUME have the same effect.
MagicQ MIDI/Timecode interfaces manufactured prior to October 2009 must be upgraded to latest firmware by ChamSys to support MIDI show control messages. Please contact your dealer/distributor for more info.
For more details on MSC protocols see http://en.wikipedia.org/wiki/MIDI_Show_Control
MSC Commands are of the format
F0 7F <device_ID> 02 <command_format> <command> <data> F7
<device_ID> is 7F for "all call" ID for system wide broadcasts
<command_format> is 01 for "Lighting"
MagicQ supports the following commands in the <command>
For example:
F0 7F 7F 02 01 01 31 F7 (Go Cue 1 in the Cue Store)
F0 7F 7F 02 01 01 32 30 F7 (Go Cue 20 in the Cue Store)
F0 7F 7F 02 01 02 31 F7 (Stop Cue 1 in the Cue Store)
F0 7F 7F 02 01 01 00 31 30 F7 (Go Cue Stack 10 in the Stack Store)
F0 7F 7F 02 01 01 32 00 31 30 F7 (Go Cue 2 on Cue Stack 10 in the
Stack Store)
It is possible to test how MagicQ responds to MSC messages by typing in the MIDI message on the keyboard (this is only supported on consoles and MagicQ PC when fully unlocked (Unlocked mode) ). For example to test the command
F0 7F 7F 02 01 01 31 F7
Type testsysex followed by the message on the keyboard without the initial F0 and with no spaces between the MIDI values
testsysex 7F7F02010137F7
MagicQ Supports MIDI Beat clock messages in addition to supporting MIDI Notes & Timecode. In order to use MIDI Beat clock, first Midi devices must be setup under SETUP_ Window, VIEW SETTINGS → MIDI Timecode → Timecode Decode. This is set to either MIDI or Virtual (USB) MIDI depending if you are using direct ports on a console or a virtual/USB device on a PC system. The MIDI in type setting should also be set to Any Chan.
When MagicQ receives a MIDI Beat Clock message it toggles the remote trigger input as if the remote trigger input had been pressed or released. This option is set under SETUP_ Window, VIEW SETTINGS →PORTS → REMOTE TRIGGER TYPE.
Set Remote Trigger Type to "MIDI Beat" to get a remote trigger every MIDI beat or "MIDI Beat Half" or "MIDI Beat Qtr" to get triggers for half and quarter notes. Then set the Remote Trigger action as required.
Remote input can be used in multiple ways by setting Setup, View Settings, Ports, Remote Trigger Action including "Audio Bump" and "Tap to Time Sel PB".
| | ||