| |
| |
The programmer is the function of MagicQ where show data is configured for recording. The programmer takes priority over all playbacks. It can also be used during live running to override the outputs – for example, for changing the colour or gobo of intelligent heads.
MagicQ outputs any channels that are active in the programmer at highest priority – i.e. they over-ride all other playbacks.
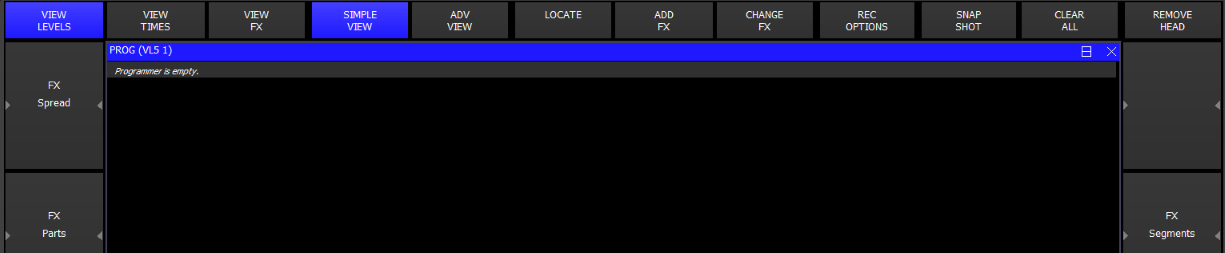
The Prog Window enables you to determine exactly what is in the programmer and how it is configured. Press PROG to open the window. The programmer stores three types of data
In the Prog Window there are three views, corresponding to the three types of data – View Levels, View Times and View FX. Use the three top left soft buttons to select the view.
In the Channel Times and Channel View windows you have a choice of a Simple View or an Advanced View. The Simple View is sufficient for most programming – it enables modifications of fade times on a per attribute type basis and modifications of each programmed FX. The Advanced View enables fade times and FX parameters to be set up on a per channel basis.
In Levels View select Advanced View to view the raw values rather than the palette/range names.
The LED on the CLEAR button is illuminated when there is data in the programmer.
A second copy of the Programmer Window, the Programmer Info Window can be opened for displaying on an external monitor. Press CTRL + Prog to open the Programmer Info Window.

To clear the Programmer press CLEAR. All channels will be deactivated and all HTP channels will be set to zero.
Pressing SHIFT CLEAR clears the heads that you have currently selected. Use this to clear one or more heads without clearing all heads from the programmer.
To clear the programmer over a period of time, type a number before pressing CLEAR, e.g. Press 5 CLEAR to clear the programmer over 5 seconds.
To set all channels to default values use CTRL + CLEAR (supported from v1.7.2.1 and above).
It is possible to force all LTP channels to zero by using SHIFT + CTRL + CLEAR. (supported from v1.7.2.1 - in previous version this was supported on CTRL + CLEAR).
After CLEAR has been pressed, the programmer is empty - i.e. there are no channels active in the programmer. When the level of a dimmer channel or an attribute of an intelligent head is changed for the first time then it becomes active in the programmer.
For heads with multiple channels, there is a choice here as to how the other attributes of a head are affected by the activation of one of the head attributes.
By default, if one attribute of a head is changed then only that attribute is activated - this is referred to as "Activation by Chan". This can be modified in the Setup Window in the "Activate chans/head" option. When set to "head" then when one attribute of a head is changed, all the attributes of the head are activated. For LTP channels the values of the attributes in the programmer are set to the current output value. HTP channels will remain at zero.
MagicQ also supports "IPCB", "IPC" and "Col". These group similar parameters together, so for example if you touch a colour attribute or the colour attributes are loaded into the programmer. "IPCB" means all Intensity, Position, Colour and Beam attributes work in this way, whereas "IPC" only works on Intensity, Position and Colour attributes, not Beam attributes.
Performing a LOCATE activates all parameters. At any time all of the attributes of the selected heads can be forced into the programmer by opening the Programmer Window, holding SHIFT and pressing ACTIVE.
The basic unit of storage on the console is the Cue, which stores
This corresponds to the information in the programmer - recording a Cue is simply a matter of transferring what is in the programmer into the Cue.
To record a Cue, first set up the look, then press RECORD and press the SELECT button of the Playback to record the Cue onto.
To name the Cue, key in the name before pressing RECORD. You can name a Cue that has already been recorded by keying in the name, pressing SET and pressing the Select button for the Playback that the Cue was recorded onto.
To test the Cue, first clear the programmer by pressing CLEAR then raise the Playback fader or press the Playback FLASH button.
When a Cue is recorded it is automatically added to the Cue Store - a list of all Cues stored in the show. The Cue will be given a unique Cue Number (e.g. Q1). This enables the Cue to be re-used in future programming.
To view a recorded Cue, press the SELECT button for the Playback, and then press CUE to open the Cue Window.
The Cue Window is very similar to the Programmer Window - it has the same views for Levels, Timing and FX.
All active channels in the programmer are transferred into the Cue. Thus if "Activation by Head" is in use then all the attributes of activated heads will be stored.
If the channel level was set using a Palette, then that is also recorded so that the Cue can keep track of changes to the Palette. When you subsequently change the Palette the changes will be reflected in the Cue.
The timing information in the programmer is copied into the Cue. Cue timing can be set up before or after the Cue is recorded.
Timing information for channels consists of two types:
General Times: stored for each type of attribute (Int In, Int Out, Position, Colour, Beam)
Individual Times: stored on an individual channel basis
All Cues have General Times whereas Individual Times are optional. When a Cue has Individual Times then these override the General Times. Cues can have Individual Times set for only certain heads or attributes – in this case Individual Times will be used for those heads and attributes, whilst the General Times will be used for all other heads and attributes.
It is possible to add Split Cue times (different times for different heads) both before a Cue is programmed in the Programmer Window and afterwards in the Cue Window.
Split times can be added by playing back Palettes with time or by directly editing the Times in the Programmer or Cue Windows.
In both the Programmer and the Cue Window the View Times has two views – View Simple and View Advanced. View Simple is used for simple changes to times including entering split times across the selected heads. View Advanced is used for editing attribute times for a particular head one by one.
The View Simple shows both General Times and Individual Times. The General Times are the times that are applied by default to attributes in the Cue – i.e. if you do not specify any Individual Time for an attribute on a head then the General Times will be used. The Individual Times lets you enter times for specific heads and for specific attributes.

If you select some heads selected then the Individual Times will show you the times for those heads otherwise it will show times for all heads in the Cue. If heads have different then the lowest and highest times are shown.
You can set split times in the Individual Times by selecting some heads and entering the shortest time followed by THRU and then the longest time. For instance, if you enter 4 THRU 8 in the fade field then it will set a fade times from 4 seconds to 8 seconds across the selected heads. The order is determined by the current order within the selected heads – you can change the selection order from the Group Window.
Using the NEXT HEAD, PREV HEAD displays the times for individual heads so you can step through each of the heads in turn to see their times. Use All to get back to the summary for all selected heads.
It is possible to set individual times on a per attribute view – but you must have some heads selected for this to work.
Use REMOVE to remove delay and fade times from heads – the times will be removed and MagicQ will use the General Times for these heads.
It is possible to specify the fade type in both the Programmer Window, View Times and Cue Window, View Times.
Fade types can be set for individual attributes or for attribute types such as Intensity, Position, Colour, Beam.
Note that as per individual delay and fade times, the fade type is only adjustable for attributes that are in the Programmer / Cue.
In the View Advanced you can set delay and fade times on a per head and per attribute basis one at a time. It is also possible to set multiple heads and multiple attributes by highlighting multiple items using SHIFT and the cursor keys. To fan times across heads use Simple View.
To Record to a specific Cue Id in a Cue Stack, enter the Cue Id number on the keypad before you press RECORD and select the Playback S button.
It is also possible when the Setup option "Select Heads and Palettes from keypad" is set to record Cues using only the keypad.
Press RECORD + ENTER to record directly to the currently selected Playback. You can record to a specific Cue Id on the currently selected playback by entering a number and pressing RECORD + ENTER.
You can record to a specific Cue Id and Playback by entering the Playback number followed by /, followed by the Cue Id and pressing RECORD + ENTER.
For example 6/2.0 ENTER records to Playback 6, Cue Id 2.0.
MagicQ stores Snapshot images of the Visualisation, Media or Pixel Mapping output when recording Cues and Palettes enabling easy identification of the contents of Cues and Palettes. MagicQ grabs Snapshots directly from MagicVis and MagicHD. MagicQ can also grab Snapshots from Capture using CITP and from MSEX compliant Media Servers.
Icon snapshots are stored on the MagicQ system/console rather than in the show file to avoid the show file getting too large. In normal operation MagicQ will save the icon snapshots to the icon folder on the MagicQ system and retrieve them when needed for display. To copy icon snapshots along with your show file to a different MagicQ system, then the show extras file (.xhw) needs to be copied along with the show file of the same name. These icon snapshots will then be loaded alongside the show file when opened.
MagicQ will only store snapshot icons when the relevant Visualiser / Media Server is active and connected.
Record options can be accessed when recording by pressing SHIFT and RECORD or at any time using the REC OPTIONS soft button in the Programmer Window.

There are many short-cuts keys for recording
Record Merge
Hold S and press REC | Record Merge into Current Cue on Playback |
REC 0 ENTER | Record Merge into Current Cue on Playback |
REC UPDATE | Record Merge into Current Cue on Playback |
Hold + and press REC | Record Merge (then choose where to merge) |
Hold – and press REC | Record Remove (then choose where to record) |
Hold UPDATE and press REC | Record Update (then choose where to record) |
Record Cue Only
Hold / and press REC | Record cue only (then choose where to record) |
Record selected heads only
Hold * and press REC | Record selected heads only |
Hold * and + and press REC | Record merge selected heads only |
Hold * and - and press REC | Record remove selected heads only |
The console supports comprehensive masking facilities to enable the operator to select which attributes are recorded from the programmer into Cues.
By default there is no masking applied - all channels in the programmer are recorded into Cues. Two types of masking can be applied - masking by attribute type and masking by attribute.
Masking by attribute type enables the operator to select which of the intensity, position, colour and beam attribute types is recorded. Press the REC INT, REC POS, REC COL and REC BEAM soft buttons to select the attribute types to be recorded.
Select attributes in the Record Options Window to select to record individual attributes into the Cue.
Select Entire State to record all the values in the Programmer regardless of whether they have been changed since the last Cue was record – this forces a blocking Cue to be recorded with hard values. Use ALL + RECORD as a shortcut to select Entire State.
The Status Display indicates when any masking is active. Masking is cleared once a Cue is recorded - this can be prevented by pressing the LOCK MASK soft button in the Record Options Window.
The Record Option Window displays individual attribute names based on the currently selected head so that it is easy to recognise the attributes to select. If no heads are currently selected then it uses the first active head in the programmer.
Masking can be selected quickly by holding Intensity, Position, Beam or Colour and pressing RECORD for recording only the selected attributes.
The console supports several additional options for recording Cues. These include recording all the channels from heads regardless of whether they are active in the programmer and recording only heads that are currently selected. Press the REC OPTIONS soft button and select an option.
Record options return to the defaults once a Cue is recorded.
MagicQ has an Active function for loading attributes into the programmer at their current value. This can be used to ensure that the programmer contains all the attributes of the selected heads, or to add in individual attributes to the programmer.
To make individual attributes active in the programmer, hold SET and press the soft button associated with the attribute in the Intensity, Position, Colour, Beam windows.
It is also possible to make active entire Intensity, Position, Colour or Beam attributes by holding Position, Colour or Beam or Intensity and pressing SET.
To make all the attributes of a group of heads active, first select the heads you want to control, then hold * and press SET. Alternatively in the Programmer Window press SHIFT and select ACTIVE.
To remove (knock out) items from the programmer.
Then choose one of the following methods
It is also possible to remove attributes from the programmer by editing the spread sheet view in the Programmer Window.
Select the item (s) with the cursor that you wish to remove from the programmer and then press the REMOVE soft button.
For example, to remove the iris attributes for all heads in the programmer:
To remove, all of the attributes of MAC500 head numbers 2 and 3 from the programmer:
To remove, the FX for head number 2:
Channels in the programmer can be set to have hard values instead of palette values. This function can be accessed in the Programmer Window, View Levels with SHIFT + MAKE HARD. All attributes of the currently selected heads that are active in the programmer are made hard (non palette) values. If no heads are selected then all heads in the programmer are affected.
Keyboard shortcuts are also available by holding POS, COL, BEAM, * or one of the attribute soft buttons and pressing INC. This operates in a similar way to making channels active using SET, knocking out channels using REMOVE or partial locating channels with LOCATE.
To make channels hard in the the programmer.
Then choose one of the following methods
You can copy between heads using the keypad. To copy the head data, select some heads from the keypad, press COPY and then enter the destination heads. For example, to copy from heads 1 to 2 to heads 5 to 8
1 THRU 2 COPY 5 THRU 8 ENTER
MagicQ also supports the @ Syntax.
COPY 1 THRU 2 @ 5 THRU 8 ENTER
It is not necessary to have the same number of source heads as destination heads. Each of the source heads is used in turn to copy data to the destination heads.
If the source head is using a palette for an attribute then the destination head automatically also uses the palette - but uses its value from the palette, not the value from the source head.
Head data can be copied between different types of heads. If the source head is not using a palette then MagicQ will try to match range information - for example if the source head has a random strobe in the shutter channel then MagicQ will try to find a random strobe in the shutter channel of the destination head. If no range match can be found then MagicQ simply uses the hard value from the source head.
The Copy heads setting in Setup, View Settings, Cue Storage specifies whether copying of heads in the programmer is limited to the attributes that are in the programmer or whether it includes attributes that are active on playbacks.
Fade times will only be copied if the source head has level data in the programmer. FX data will only be copied between heads where the source head has FX data in the programmer.
Selected attributes can be copied rather than the entire head. In software v1.9.1.0 and above this can be done directly from the keypad.
1 THRU 2 COPY POS COL 5 THRU 8 ENTER
To specify individual attribute masks use SHIFT + COPY and set the required attribute mask. A shortcut to copy just one attribute type is to hold the attribute type button and press COPY - e.g. to copy just colour, hold COLOUR and press COPY.
COPY GROUP 1 @ GROUP 2 ENTER will copy head data from heads in Group 1 to heads in Group 2.
You can copy from the current selection to other heads by using the COPY @ syntax, e.g. to copy from currently selected heads to heads 1 and 2:
COPY @ 1 THRU 2 ENTER.
COPY @ GROUP 2 ENTER.
Copying head data in this way respects sub selection on the source - so when sub selection is active then it will only copy from heads that are sub selected not from all heads that are selected.
A show can be programmed without affecting the state of the outputs using blind programming mode. In this mode the programmer will operate as normal (with the current levels being displayed in the Prog Window) but the contents of the programmer will not be output.
Enter and exit blind mode by pressing the BLIND button. The button illuminates to indicate blind mode is active and BLIND is indicated in the status display.
Blind mode is also useful during playback for busking in FX. For example you might wish to set up a FX on some moving heads using blind mode – configuring the speed and size before you make it live.
You can enter and exit blind mode with times. For example, press 10 BLIND to enter blind mode over 10 seconds.
It is possible to park (freeze) channels using the PARK soft button in the Group Window. Press SHIFT + PARK to unpark channels.
All attributes of selected heads that are in the programmer are parked. To make all the attributes of the selected heads active, go to the Programmer Window and press SHIFT and ACTIVE.
When parking, if no attributes are in the programmer then the whole head is parked.
When unparking, all attributes of the head are unparked regardless of those that are in the programmer - this avoids the need to work out which attributes were parked.
Parking persists over shutdowns and resets. Parking information is stored in the show file.
Parking forces HTP values to the parked value regardless of other playbacks (In Group window, SHIFT + ACTIVE).
| | ||