| |
| |

The MagicQ Scene Setter enables control of MagicQ from a remote location using a fixed network connection. The Scene Setter has 4 playback faders and 12 playback buttons, and can be mapped to the wing playbacks on a MagicQ system. An LCD screen shows the legends for the playbacks.
The Scene Setter can be powered from the SnakeSys R4 which features a 3 port POE Switch, thus avoiding the need to run separate power cables. The scene setter can also be powered from any 48v PoE capable network switch that provides power on the unused Cat 5 pairs. If not used with a PoE switch, a Power over Ethernet injector will be required to power the unit.
Multiple Scene Setters can be used in a system - each with a separate ID, allowing each to control 4 different playbacks on the MagicQ system.
On MagicQ PC/Mac the system needs a MagicQ Wing or Interface, Rack Mount Dongle or SnakeSys network device connected to enable the Scene Setter functions.
The Scene Setter can be powered from the SnakeSys R4 which features a 3 port POE Switch, thus avoiding the need to run separate power cables. The Scene Setter can also be powered from any 48v PoE capable network switch that provides power on the unused Cat 5 pairs. If not used with a PoE switch, a Power over Ethernet injector will be required to power the unit.
POE is required on the unused data pairs (4,5 DC+ and 7,8 DC-). Any suitable power injector that supplies 48V at up to 1Amp on the unused pairs is acceptable. Note that you need to check the specification of your network switch or power injector as many common brand names only supply power on the used pairs, not the unused pairs.
The Scene Setters can be used with MagicQ consoles and also MagicQ PC systems. The Scene Setters are only supported on MagicQ PC systems when connected to a MagicQ USB device (not a MagicDMX interface), Rack mount dongle or SnakeSys network device.
The Scene Setters fit into a 6/8 Gang back box.
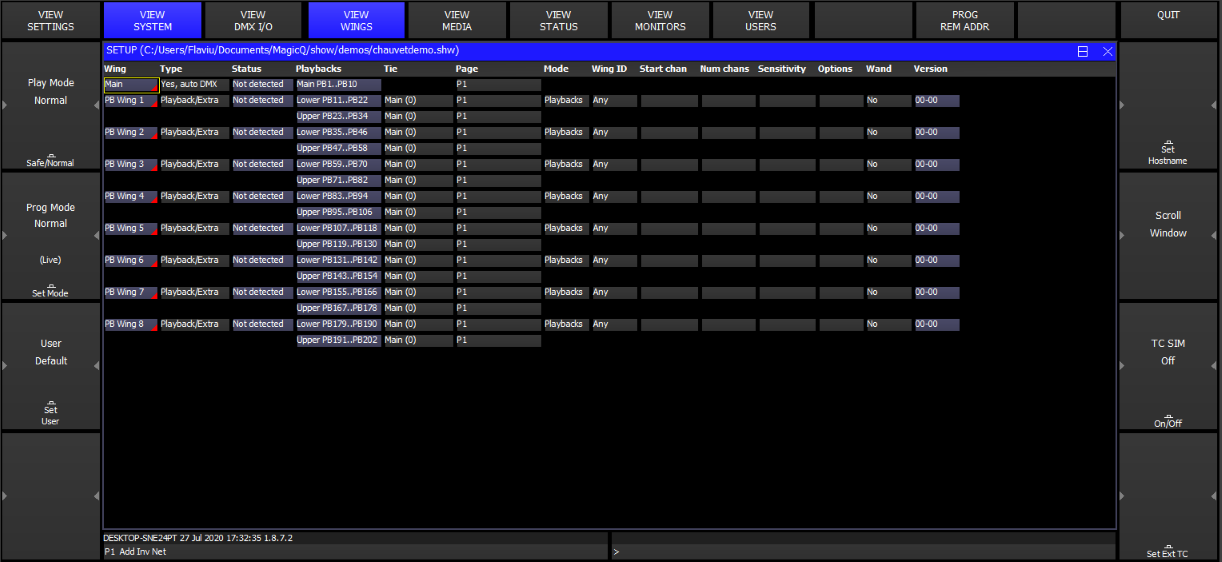
To enable the Scene Setter in MagicQ software, set one of the Wings in Setup, View System, View Wings to "Remote Panels".
A "D" in the Status Window shows that the panel is detected. It will then control four Playbacks on that Wing. Playbacks can be programmed on MagicQ from the Playback Window.
MagicQ Scene setters come with an IP address in the 2.9.200.XX range, note your MagicQ Console or MagicQ PC must be set to have an IP address in this range, with a subnet mask of 255.0.0.0.
The four playbacks control the playbacks just as if they were fader and buttons on a MagicQ Playback Wing. The top buttons are the S buttons, the next ones down the GO buttons, then the BACK buttons and the bottom buttons are FLASH buttons.
Alternatively the buttons can be assigned to Scene Setter autom events. When a button is assigned to one or more Autom events then the normal function of the button (e.g. S, Go, Back, Flash) is overridden. The button assignment affects all scene setters in the system.
Added support for Autom event to toggle Cue / Cue Stack on/off - this is useful when using Scene Setter buttons.

The Scene Setters come set with an IP address in the 2.X.X.X network range. This can be found using the Digi utility program.
To change the IP settings of the Scene Setter, you must first connect to the Utility for changing the IP address and that can be found on the URL provided below: www.digi.com
For Windows 7:
http://ftp1.digi.com/support/utilities/40002319_p.exe
When you have connected your Scene Setter to your the PC and the Digi Utility has loaded up, it will automatically look for the Scene Setter over your network. Once set up you can change the IP Address.
Advanced Scene Setter Configuration
The Scene setter can be remotely configured using a web browser.
Type the IP Address of the device into a web browser. You should see a login box. The username and password are as below.
Login: root Password: dbps
Once you are logged in then you can configure all the settings of the network module in the Scene Setter. Note that if you change the IP address of the Scene Setter then it will be necessary to use the new address in your browser address bar.
The serial port on the scene setter is set up at ChamSys so it should not be necessary to change these settings. If the configuration is lost for any reason then from the web browser connected to the Scene Setter:
Then Apply these settings.
Also set the Basic Serial Port settings to 9600, 8 bits, 1 stop bit, no parity, and no flow control.
| | ||